Recommended starting point
WireGuard
The modern starting option exposed by the current iPhone and iPad VPNClient.
VPN SETUP · iPHONE & iPAD
Follow the recommended setup for iPhone or iPad, or choose a supported manual connection method when you need it.
Quick setup
Have an active VPN-Accounts.com account, your VPN credentials and a working internet connection ready.
Download VPNClientIf iOS or iPadOS requests permission to add a VPN configuration, review and approve the normal permission required for VPNClient to establish the connection.
Each customer VPN account supports up to 10 simultaneous connections.
Download VPNClient from the App Store.
Open the app.
Enter the VPN account details supplied after purchase.
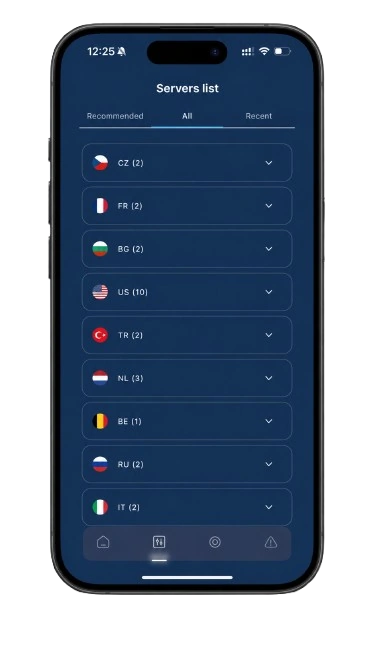
Choose a current VPN server location.
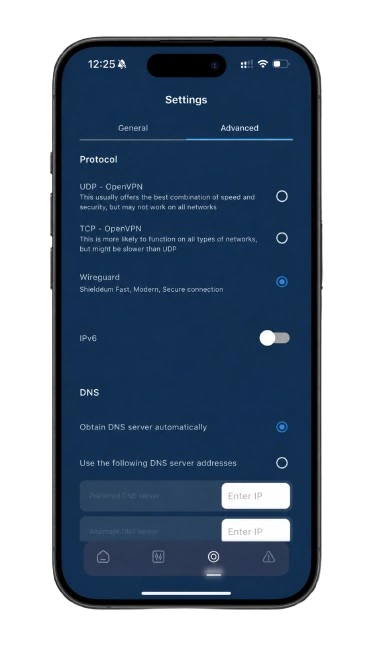
Start with WireGuard.
Connect.
Install and connect
The connection flow stays concise and avoids temporary dialog wording that can vary by iOS or iPadOS version.
Install the current VPNClient from the verified App Store destination on this page.
Launch VPNClient on the iPhone or iPad after installation.
Enter the VPN account credentials supplied after purchase.
Review and approve the normal iOS or iPadOS permission required for the app to add a VPN configuration.
Start nearby, or choose a specific country when its visible VPN IP location matters.
Start with WireGuard, connect, and confirm that VPNClient shows the active connection and selected server.
VPNClient should show an active connection and the selected VPN server.
App connection choice
Start with WireGuard. Broader protocol explanations are available in the VPN FAQ.
Recommended starting point
The modern starting option exposed by the current iPhone and iPad VPNClient.
Current OpenVPN option
A current app option where a UDP-based connection works well.
TCP-based alternative
An alternative when a TCP-based OpenVPN connection is more useful.
Manual built-in option
VPNClient remains the recommended normal setup. Manual IKEv2 is a separate built-in iOS and iPadOS option.
Example only: if you choose uk1.ipcover.net, use that hostname for both Server Address and Remote ID. Use your VPN username as Local ID. Choose a current hostname.
Open the VPN configuration area in iOS or iPadOS Settings.
Add a new IKEv2 VPN configuration.
Enter a descriptive name for the connection.
Use the selected hostname as the Server Address.
Use the same hostname as the Remote ID.
Use your VPN username as the Local ID.
Enter the required VPN account credentials when requested.
Save the configuration and connect.
Exact authentication fields can vary with the current system screen. Do not invent certificate, proxy or secret values; ask Support if the required account-authentication choice is unclear.
Ask Support Manual OpenVPN generatorConnection checks
A VPN changes the network route and visible public VPN IP. GPS, Apple ID region, App Store region, app permissions and account settings can remain separate signals.
Install VPNClient from the App Store, sign in with the VPN account details supplied after purchase, choose a current server and start with WireGuard.
Yes. The current App Store VPNClient is the normal app-based setup path for both iPhone and iPad.
Start with WireGuard. UDP OpenVPN and TCP OpenVPN are current alternatives inside VPNClient when another connection type is useful.
Yes. Manual IKEv2 is a separate built-in iOS and iPadOS setup option. It is not presented as an IKEv2 option inside VPNClient.
Choose a current location inside VPNClient. A nearby server is a practical starting point; choose a specific country when visible VPN IP location matters.
Confirm the account details, restart VPNClient, try another current server, try WireGuard or an OpenVPN option, and compare Wi-Fi with mobile data before contacting Support.
iPhone and iPad VPN access
Install the current VPNClient, or get VPN access before you begin.